2. Download the plug-in and install it. To do that extract normalmap.exe and glew32.dll to your GIMP plugins directory that looks like C:\Program Files\GIMP-2.0\lib\gimp\2.0\plug-ins. Place libgtkglext-win32-1.0-0.dll and libgdkglext-win32-1.0-0.dll in the same directory (the readme tells something different but that works as well).
3. Start the program and open an ordinary brick texture (also called diffusemap). The example texture is from BerneyBoy's Textures (http://berneyboy.planetquake.gamespy.com/). I'm using brick066.jpg.
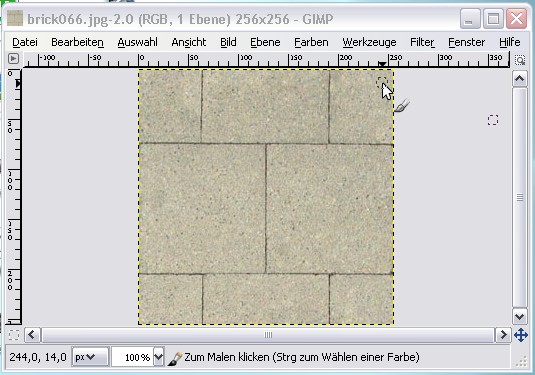
4. Save the file as TGA as brick066.tga but don't use RLE compression.
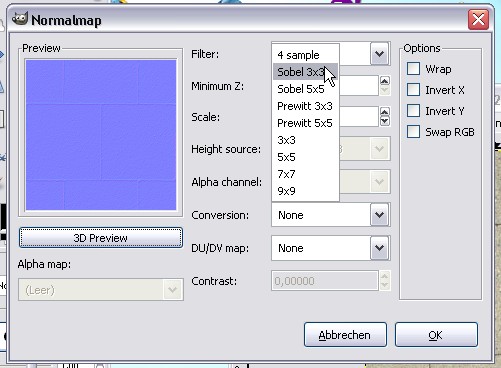
5. Let's start creating the normal map (also known as bump map or relief). Go to the filters menu and select the Normalmap entry there.
6.You will see several options but let's select Sobel 3x3 for the best and quickest results. You can of course preview the normal map by clicking on 3D Preview. The option Sphere gives a nice view.
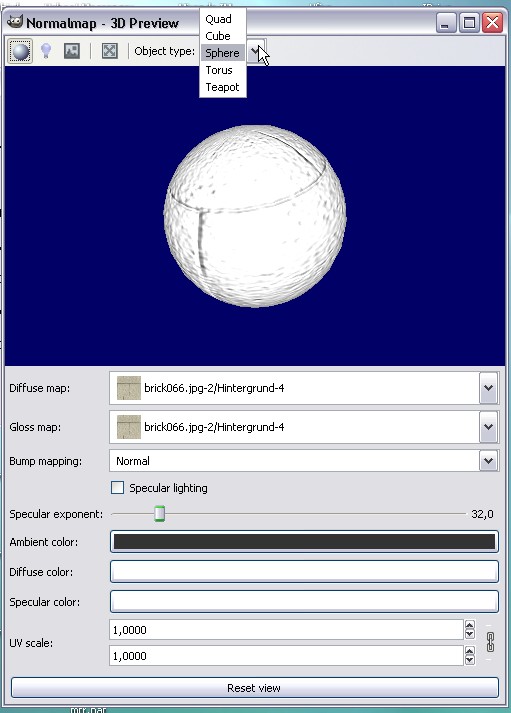
7. After you are done with adjusting the normalmap you will need to save the brick texture that became blue and purple. In this example I added _nm to the filename resulting in brick066_nm.tga.
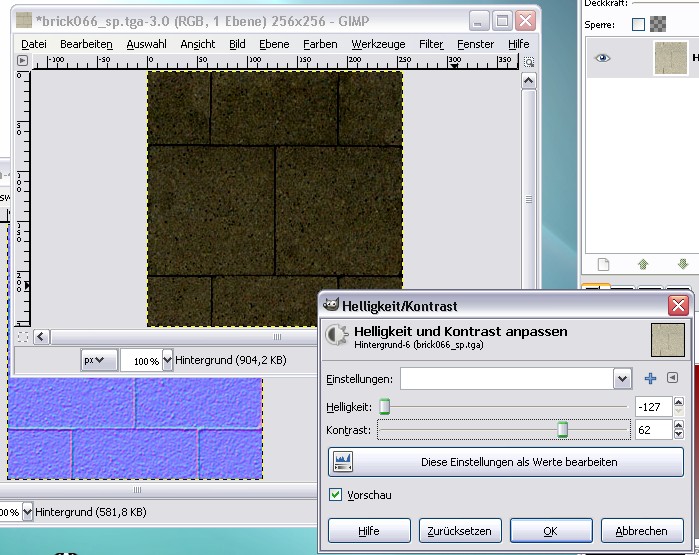
8. We are going to create the specular map (that defines what's shiny in the texture) based on the diffusemap. In the Brightness/Saturisation adjustment panel move the upper slider to the far left and the lower to the right. You should get an image with more contrast on the bright areas.
Note: You can try to make it even darker to get less specularity.
9. Now that we got the textures we need to copy them to the base\textures\mymap folder.
10. In base\materials create an empty .mtr file and create a code like this in it:
 material textures/mymap/brick066

{

surfacetype "metal"

{

diffusemap textures/mymap/brick066.tga.tga

bumpmap textures/mymap/brick066_nm.tga.tga

specularmap textures/mymap/brick066_sp.tga.tga

}

}
The material brings all three texutures together.
11.You are now ready to preview the texutre in the SDK. Please read the general information about adding custom textures by Splashdamage as well.